1. Please search for your model on Biostar's official website first, and select the latest BIOS version on the "Download" page.
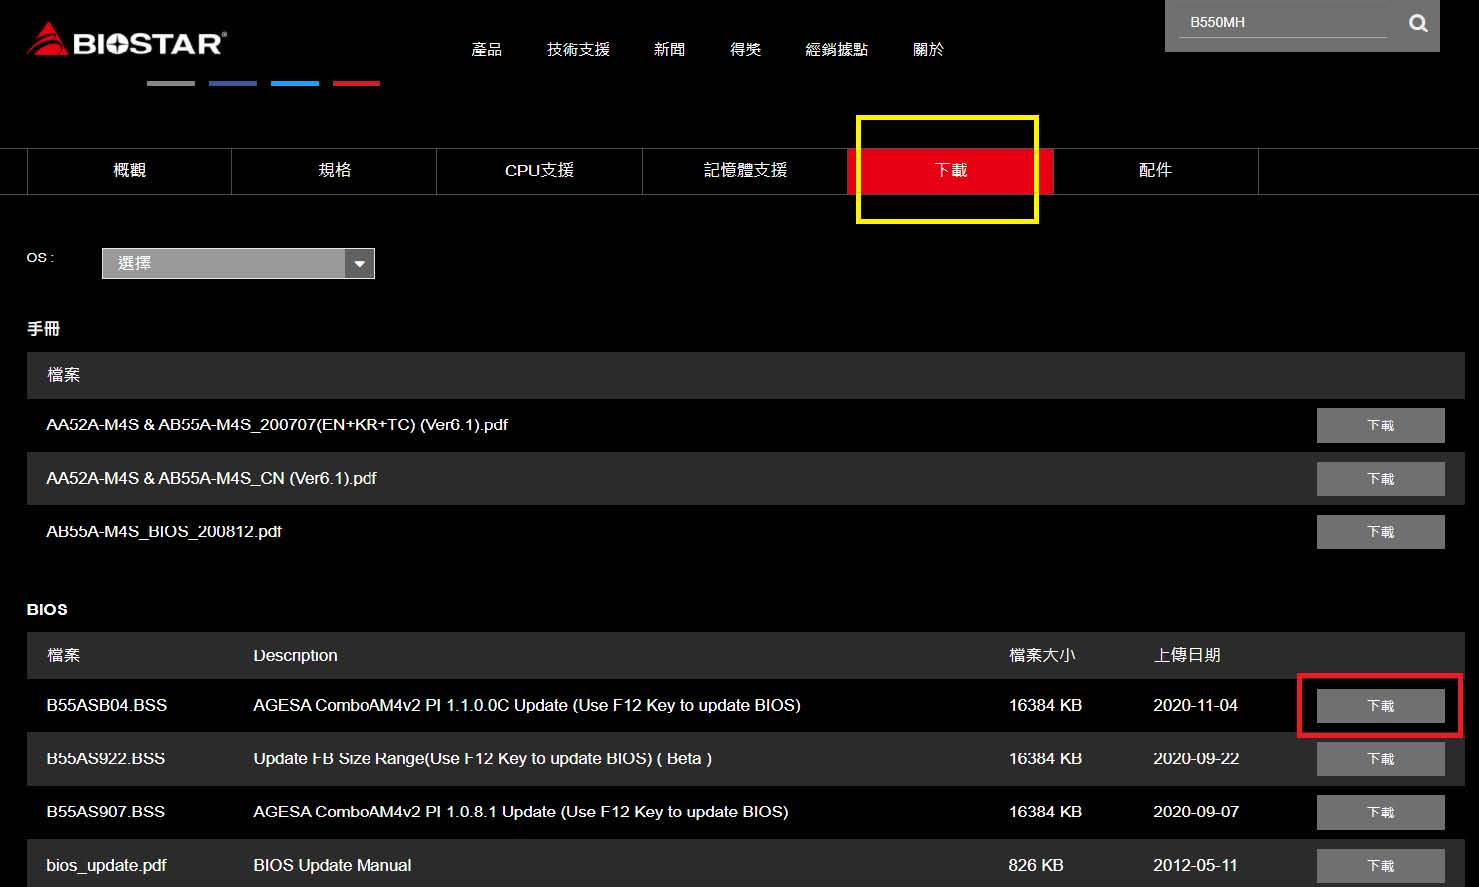
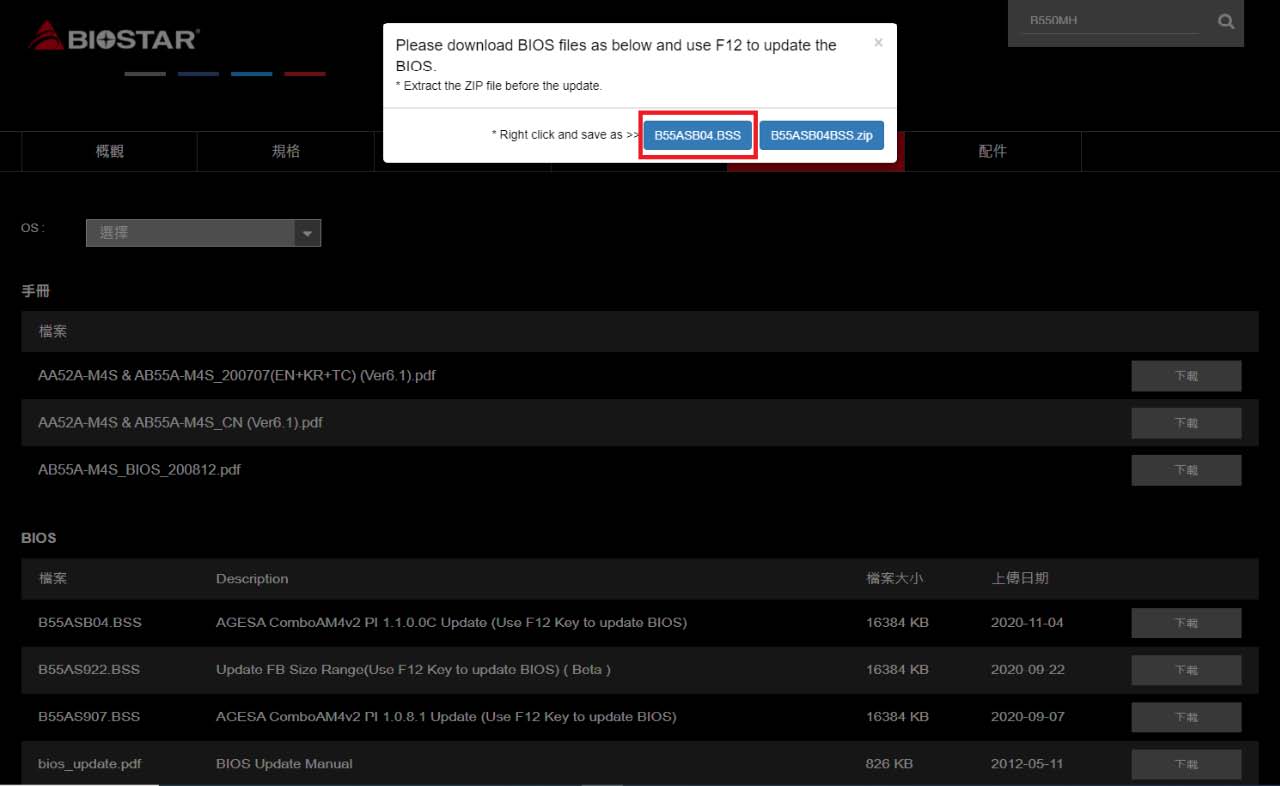
2. After clicking the download button, the download method of the requested file will pop up at the top of the page. On the left is the BIOS file, and on the right is the BIOS compressed file.
It is recommended to directly select the BIOS file on the left to download.
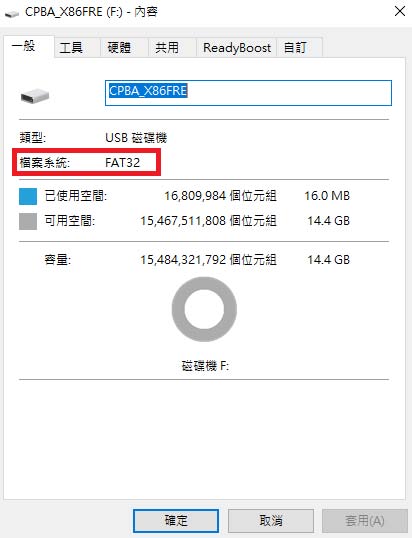
3. After the download is complete, drag the BIOS file to the USB. Please right-click "Content" in the blank space and make sure that the format of the USB flash drive is "FAT32".

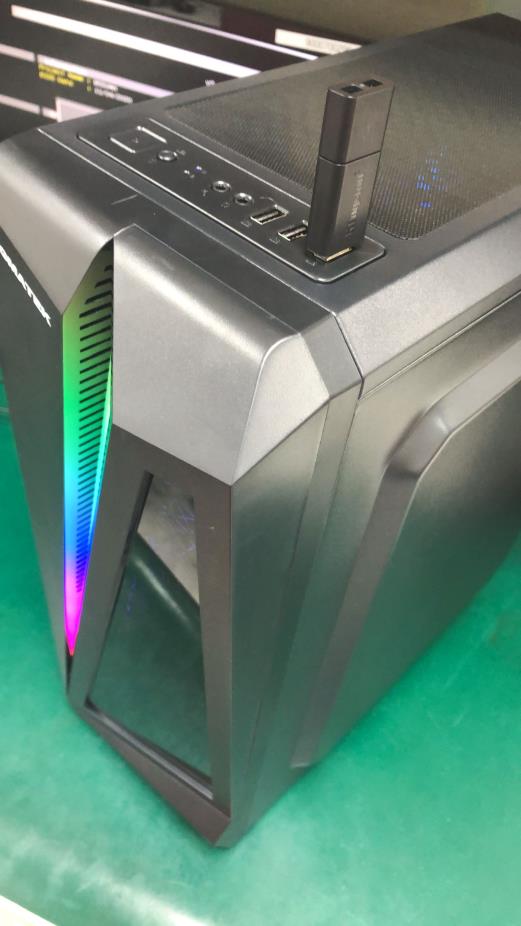
4. Connect the USB flash drive to the system to be updated.
5. Please turn on the computer and press the "Delete" key to enter the BIOS immediately, and the screen will display as follows
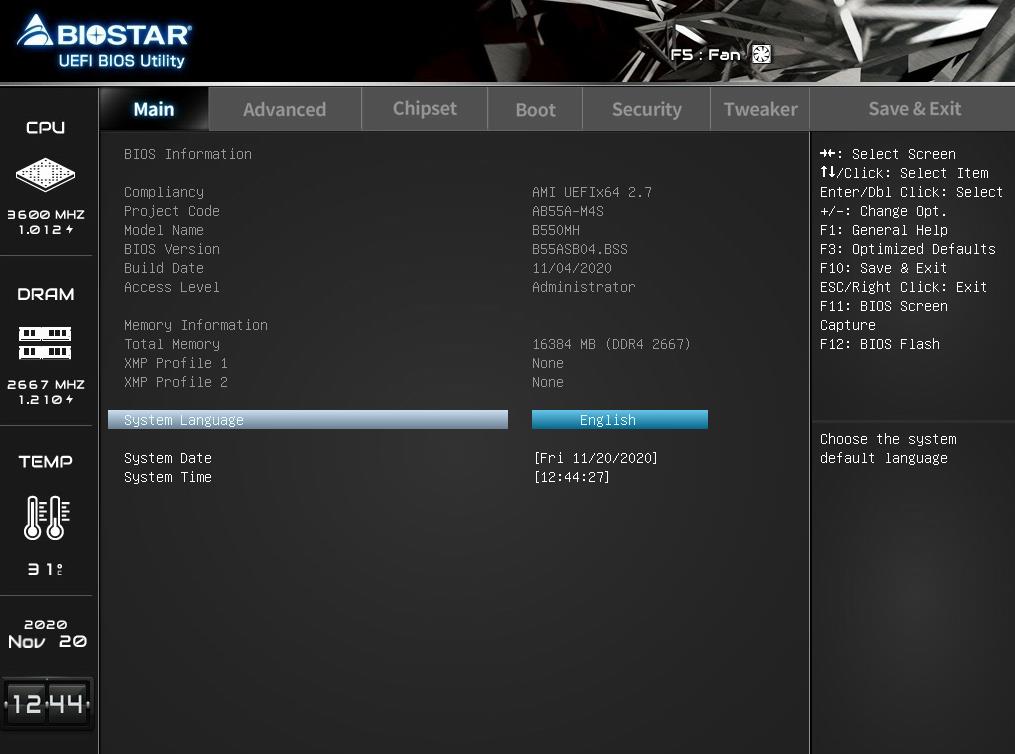
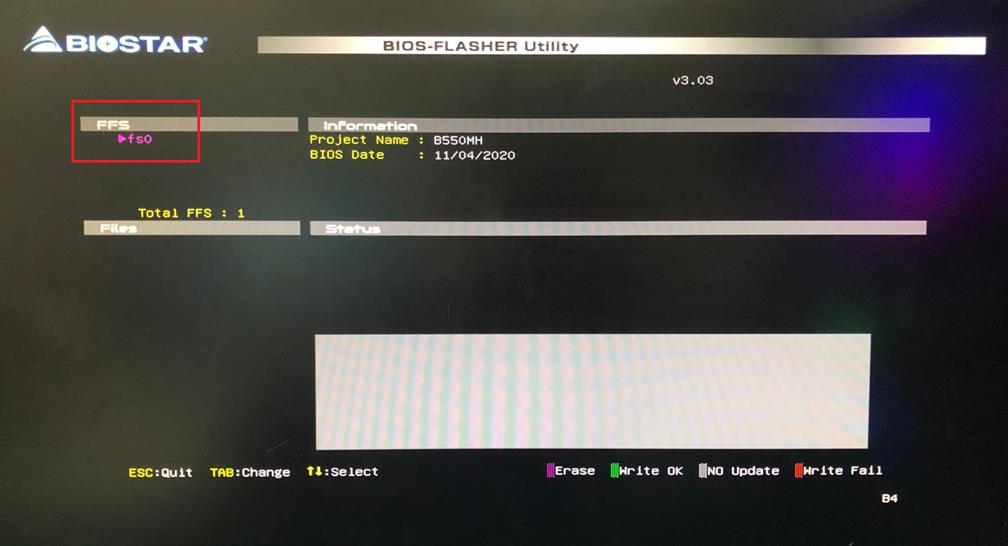
6. After entering the BIOS, please press F12 again to enter the BIOS update page "BIOS-Flasher Utility". At this time, "fs0" in the figure below is the detected USB device. If you connect multiple USB or hard disks, if it is a hard disk, there will be several optional devices such as "fs1" and "fs2". Please confirm the correct flash drive and press "Enter" to open it.
7. The BIOS file just dragged to the USB will appear
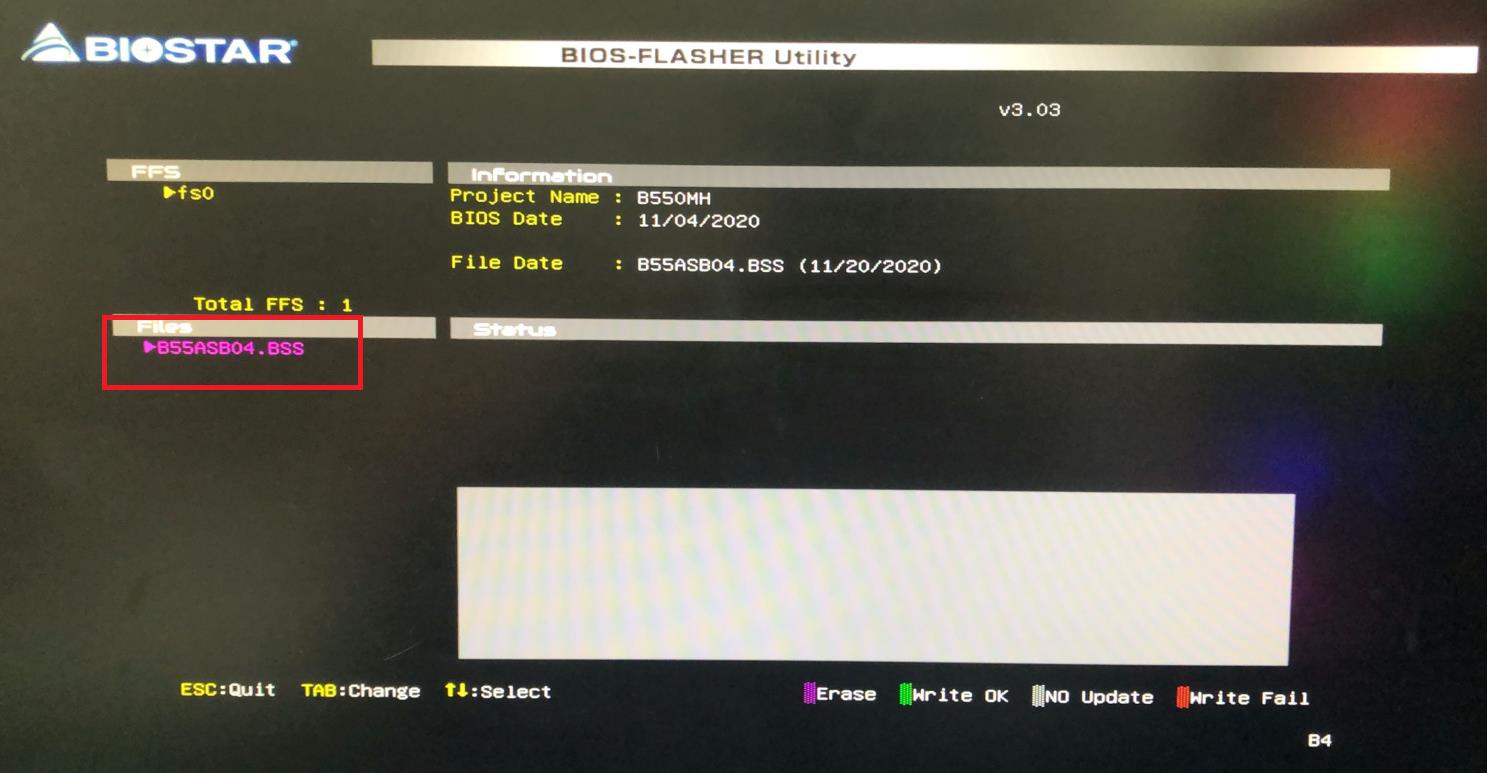
8. Press "Enter" again, the system will ask whether to update this BIOS file, please press the "Y" key.
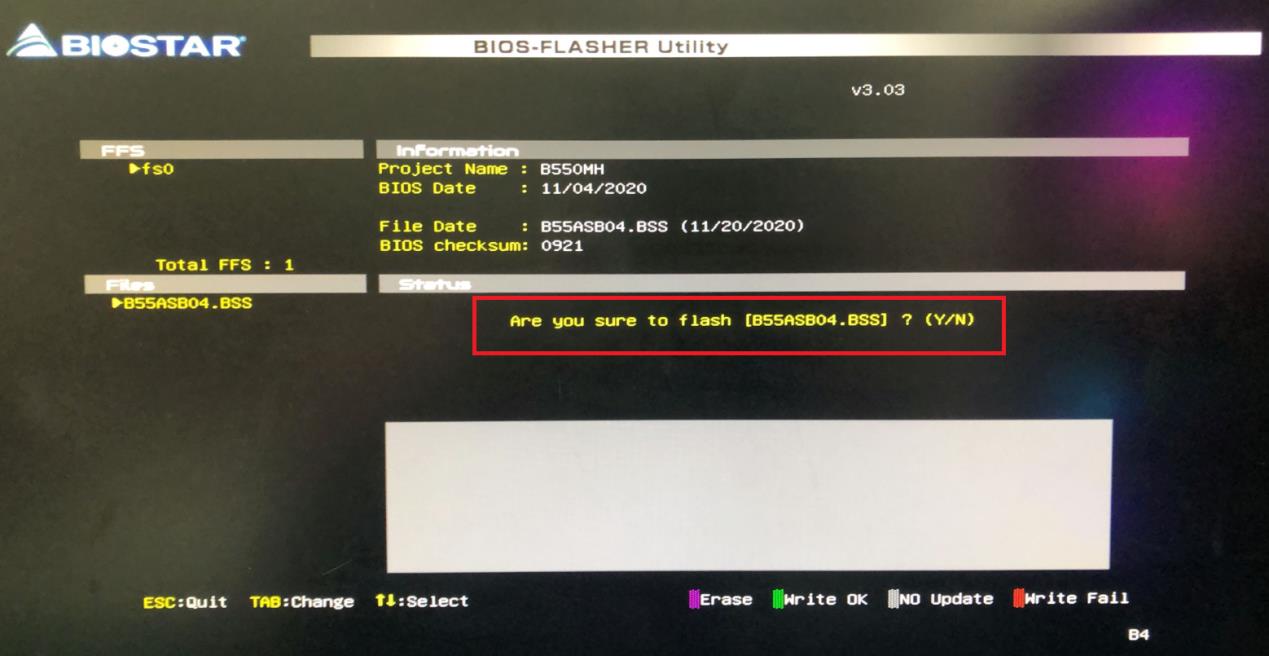
9.During the BIOS update process, do not turn off the power or perform other operations.
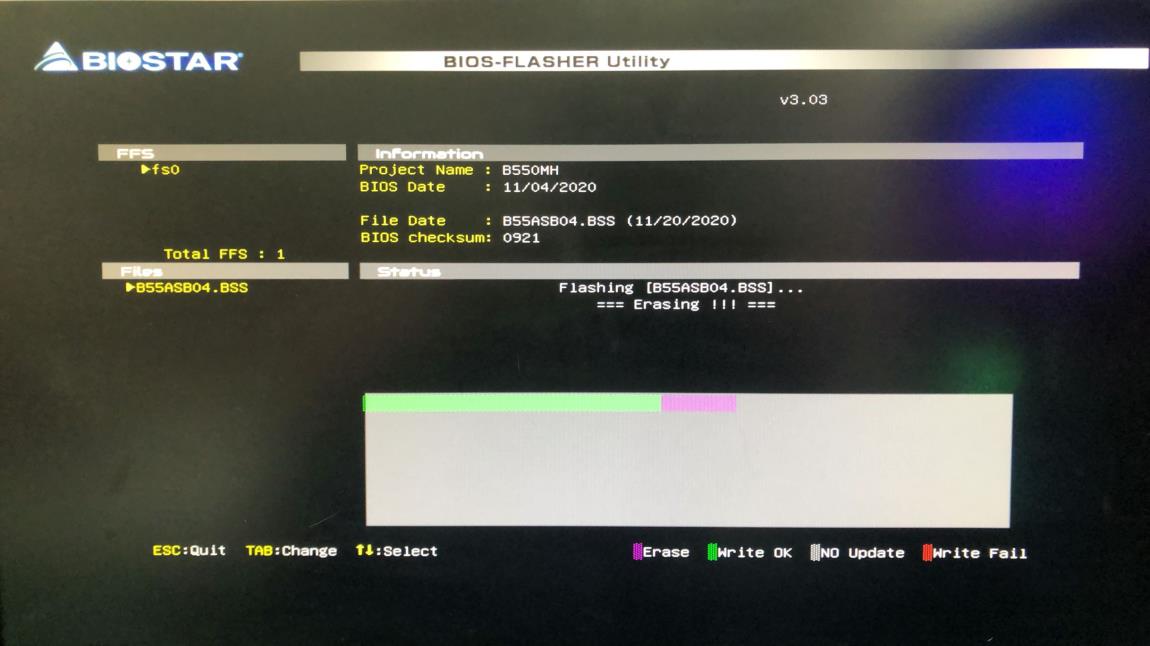
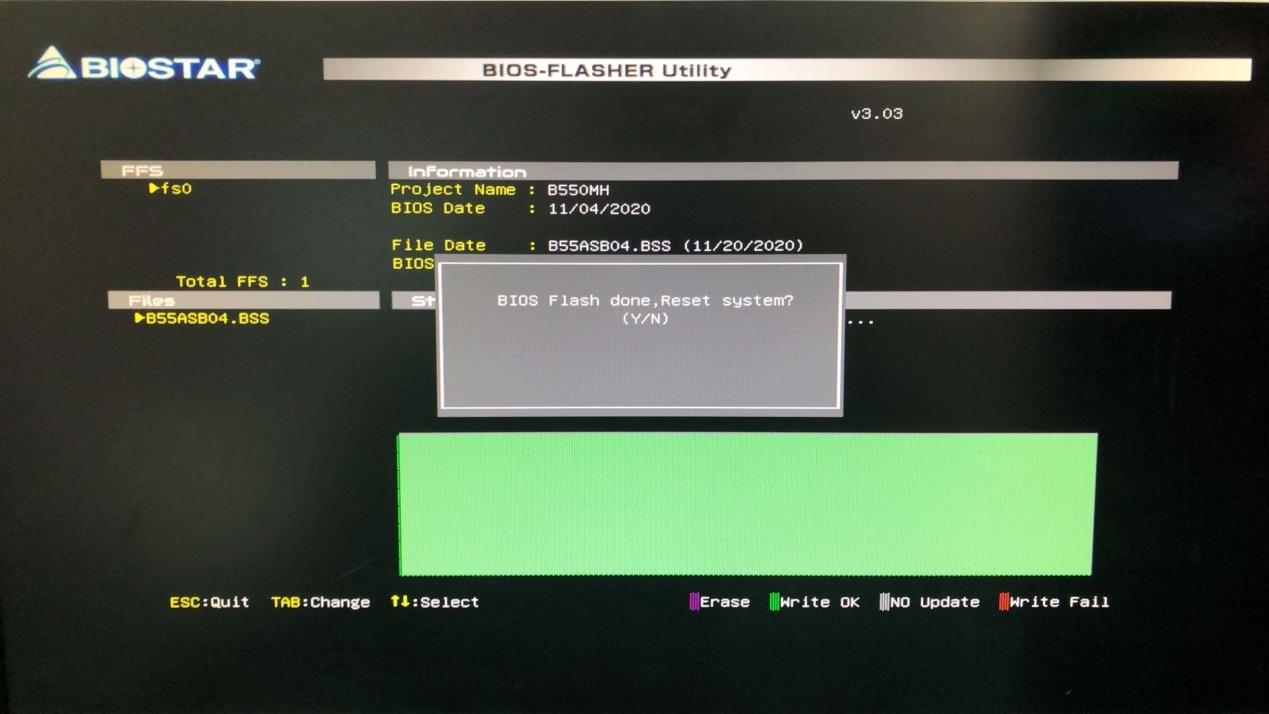
10. After the update is completed, the screen is as follows, please press "Y" to restart. After restarting, please press the "Delete" key again to enter the BIOS.
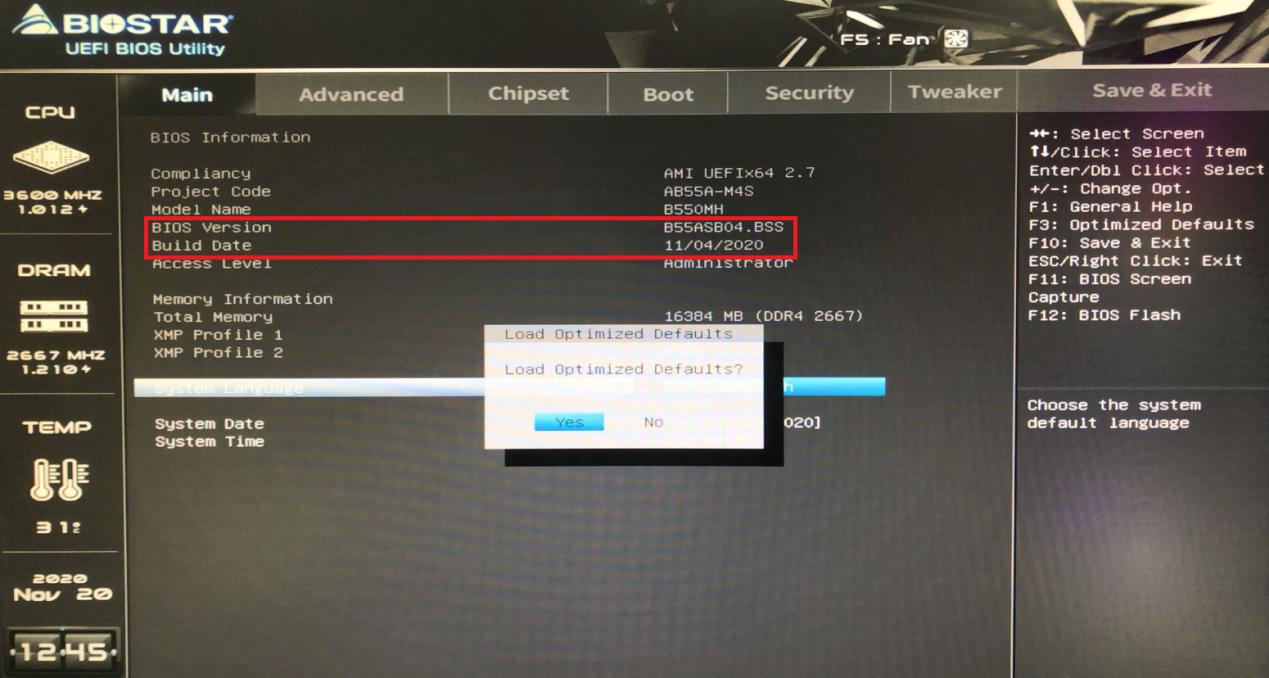
11. After confirming that the BIOS version has been successfully updated, system optimization settings must be performed before entering Windows. Press "F3" and select "Yes" to optimize the settings.
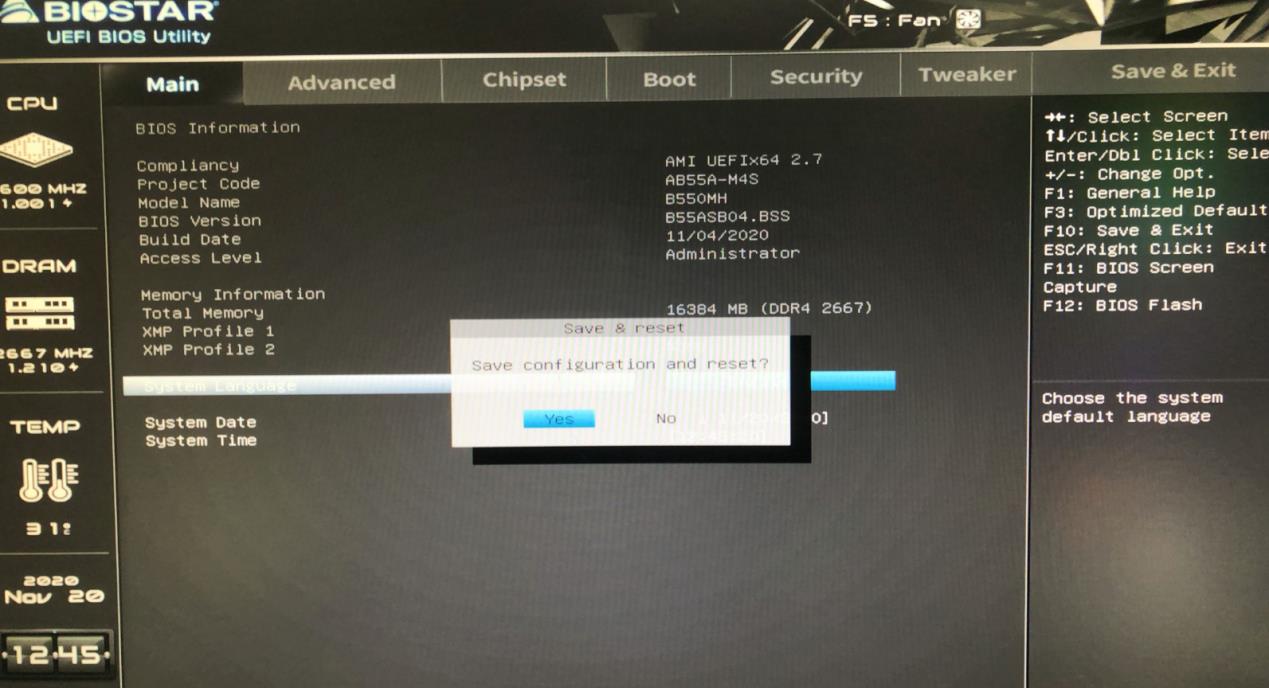
12. Press "F10" again, and also select "Yes" to save and exit.
13. At this point, the update has been completed and can be used normally.


